Aroma is Coffee IT’s new suite of open source components, developed to make development easier and more efficient for ourselves and developers all over the world. The Android Pincode component is the first component of the suite that became open source. It provides a highly customisable pincode view. The Pincode component is also available for iOS. The second component of the suite that became open source is the Android EmojiPicker. In this blogpost we’re showing how to create and publish your own open source Android libary.
*This blogpost is written by our Senior Android Developer Daphne van der Veeke.
Creating a library
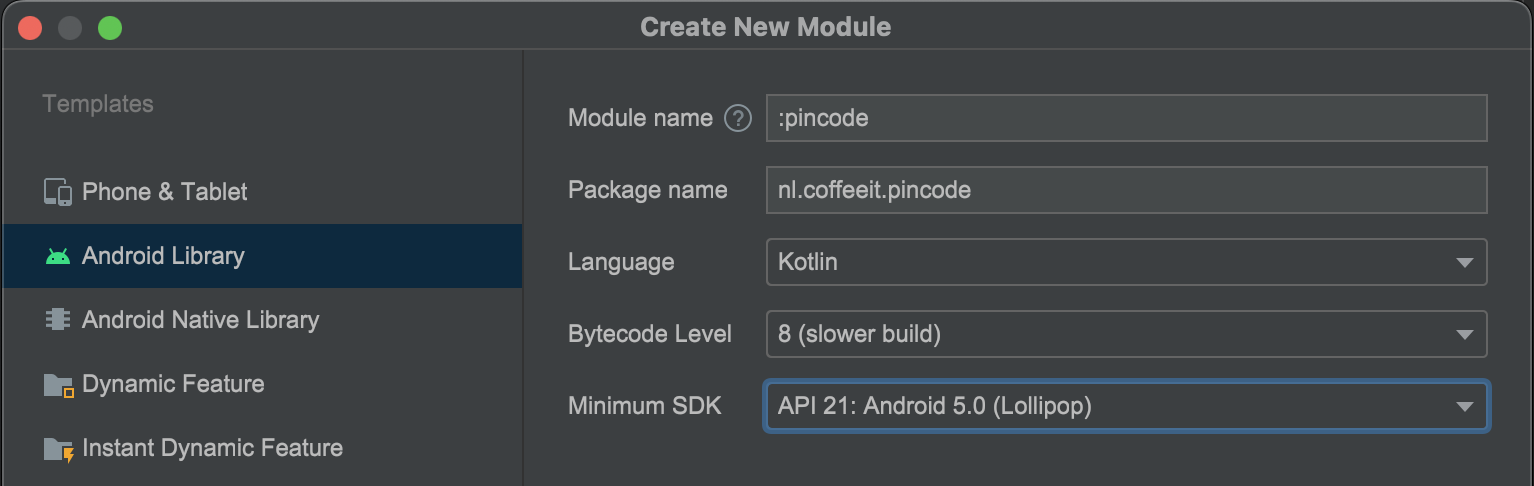
If you want to create an Android library like the Pincode component, it’s easiest to create a library and a sample app in the same Android Studio project. This way, you won’t have any app-related code in your component and the app is able to make use of the latest changes of the component, without having to publish the component’s dependency first. To achieve this, create a new project. The automatically created module will be your sample app. Then create a new module in the same project.

This module will be your library, so configure it as a library.
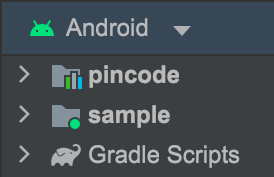
If the newly created module doesn’t show up in the project structure after creating it, make sure to click File -> Invalidate Caches -> Invalidate and Restart. When this process is done, you should see both the sample app and the library in your project structure.
Now you can start writing code! Since this blog focuses on the creation and publication of libraries, I won’t go into detail about the code itself. If you’re curious about the Pincode component source code, check out the project on Github. The same goes for the EmojiPicker.
For this example, we’re keeping it easy and our component will consist of a blue square in the middle of the screen. Jetpack Compose is used for this since Compose is a powerful tool to create our Aroma components, but you can also use XML. In your library module, create a file and add the code to display the blue square.
@Composable
fun PincodeView() {
   Box(
       modifier = Modifier.fillMaxSize()
   ) {
       Box(
           modifier = Modifier
               .size(60.dp)
               .background(Color.Blue)
               .align(Alignment.Center)
       )
   }
}
Now you can use the composable PincodeView you just created in your sample app. With the following code you can use the PincodeView composable in your Activity and display a preview of it in Android Studio.
class MainActivity : PincodeView() {

   override fun onCreate(savedInstanceState: Bundle?) {
       super.onCreate(savedInstanceState)
       setContent {
           PincodeView()
       }
   }
}

@Composable
@Preview(showBackground = true)
fun ModalPincodePreview() {
   PincodeView()
}
If you run this, you will see a blue square in the middle of the screen. When you change something in your PincodeView composable, the changes are immediately reflected in the sample app when run again. This is how you can develop, test and tweak your component until you’re satisfied with it. The next step is to publish your library.
Some general advice for when you’re creating a library like the Pincode component:
- If you’re using XML, you can overwrite resource values of the component in the app. For example, let’s say the Pincode component would be made in XML and it would contain a color resource for the background of the pin inputs of which the color is set to white:
#FFFFFF . The app implementing the color can overwrite this colour resource by putting the same key in its own colors.xml and assigning a different color to it. Therefore, as the developer of a library, make sure to prefix the resource key with the library’s module name, so it doesn’t accidentally get overwritten by the app or clash with existing values in the app. - Think through which fields and methods you’re making public and which ones you’re making private or internal. The app implementing your library probably shouldn’t be able to access all code in the library.
- Use as few third-party dependencies as possible. This prevents clashes with the main app when it uses a different version of the same dependency, but it’s also easier to maintain your library when it’s not influenced by the code of a third party.
Publishing a library
Coffee IT’s Android team uses Sonatype to publish libraries so they become visible to the world. The Android Pincode component and Android EmojiPicker are also published with Sonatype. This part of the blog will explain what steps need to be taken in order to publish a library via Sonatype. It starts with setting up Sonatype, then generating a GPG key and finally setting up the project.
Set up Sonatype
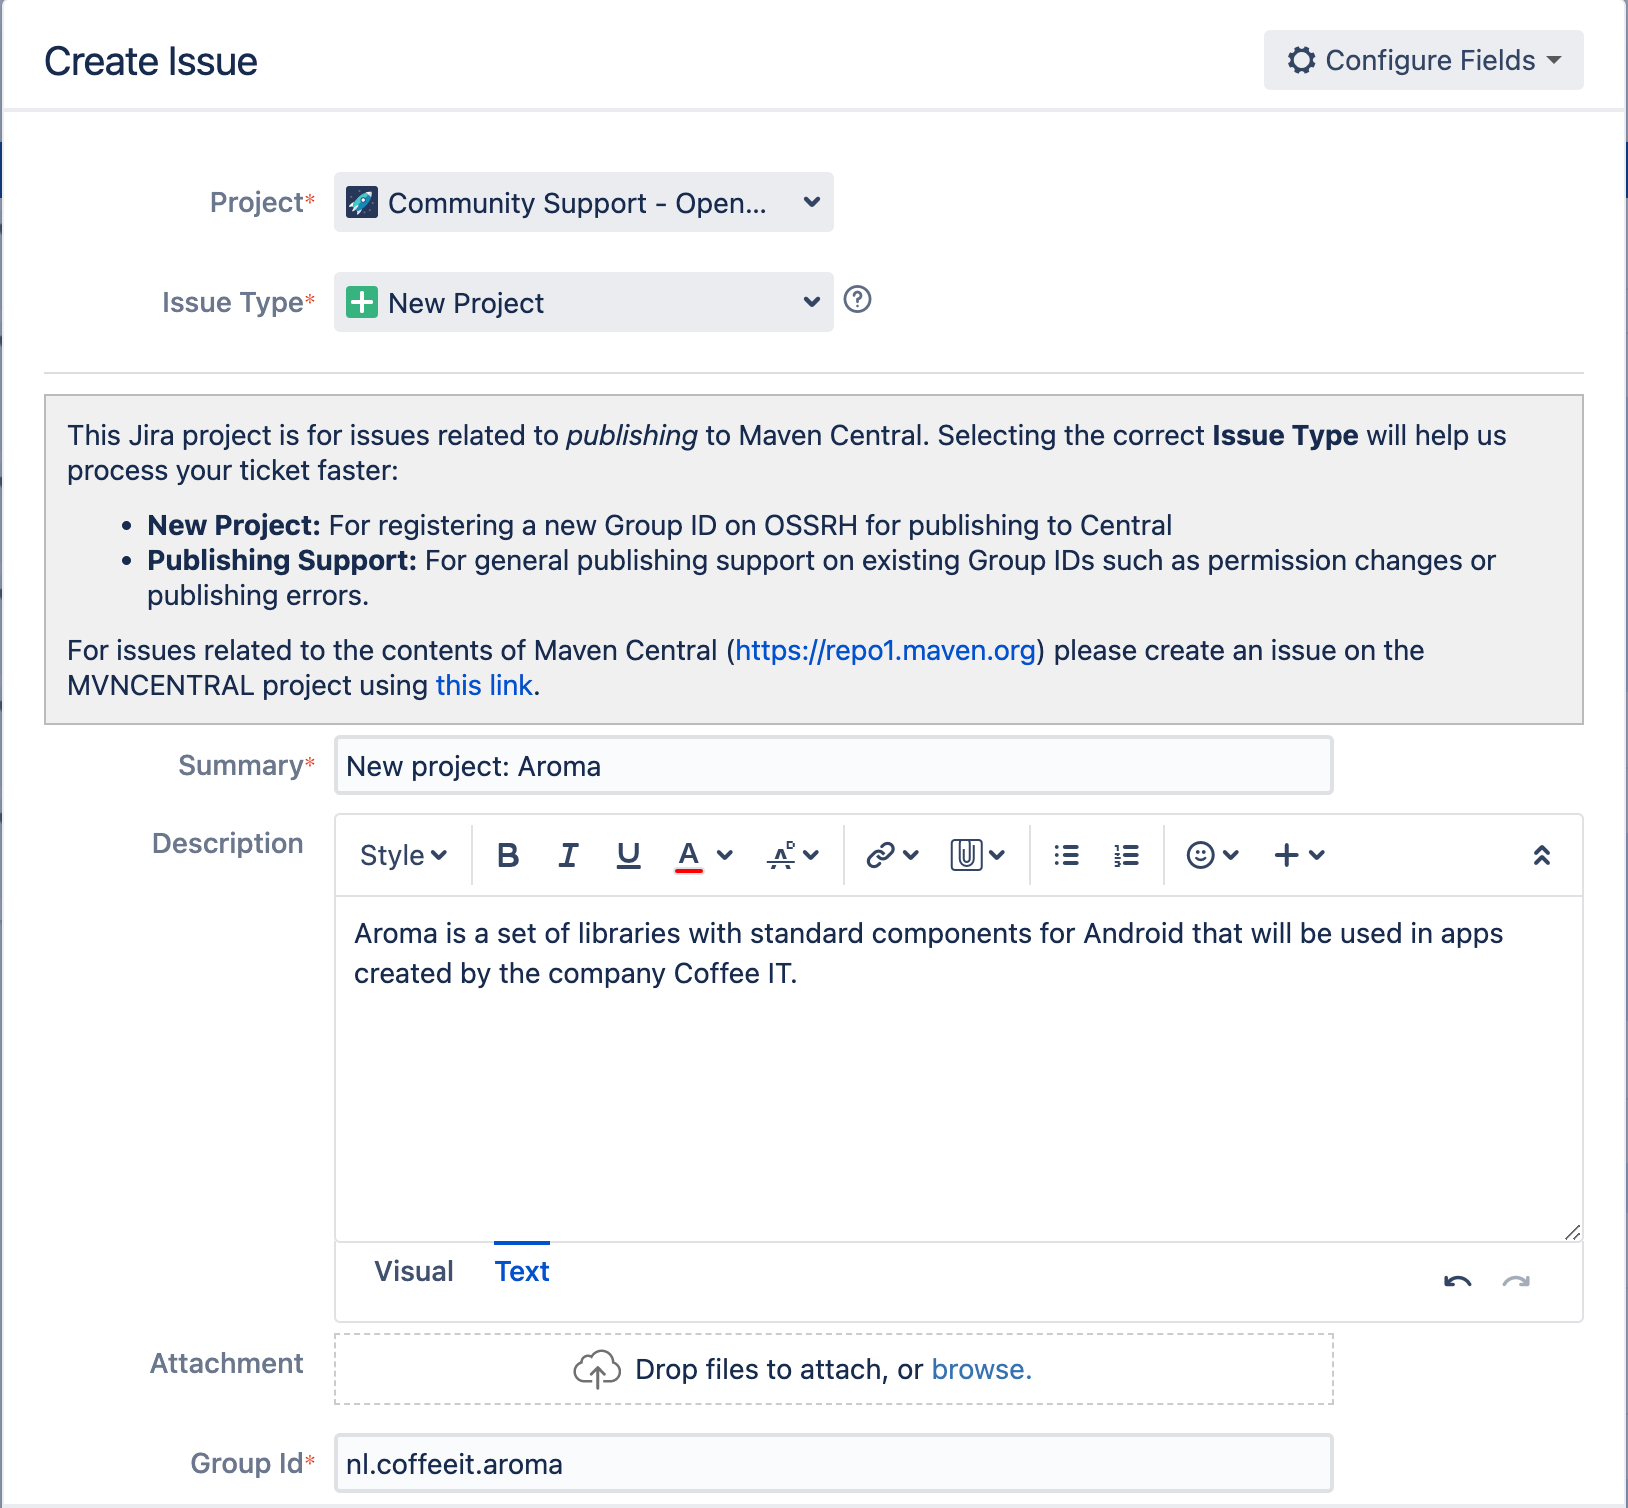
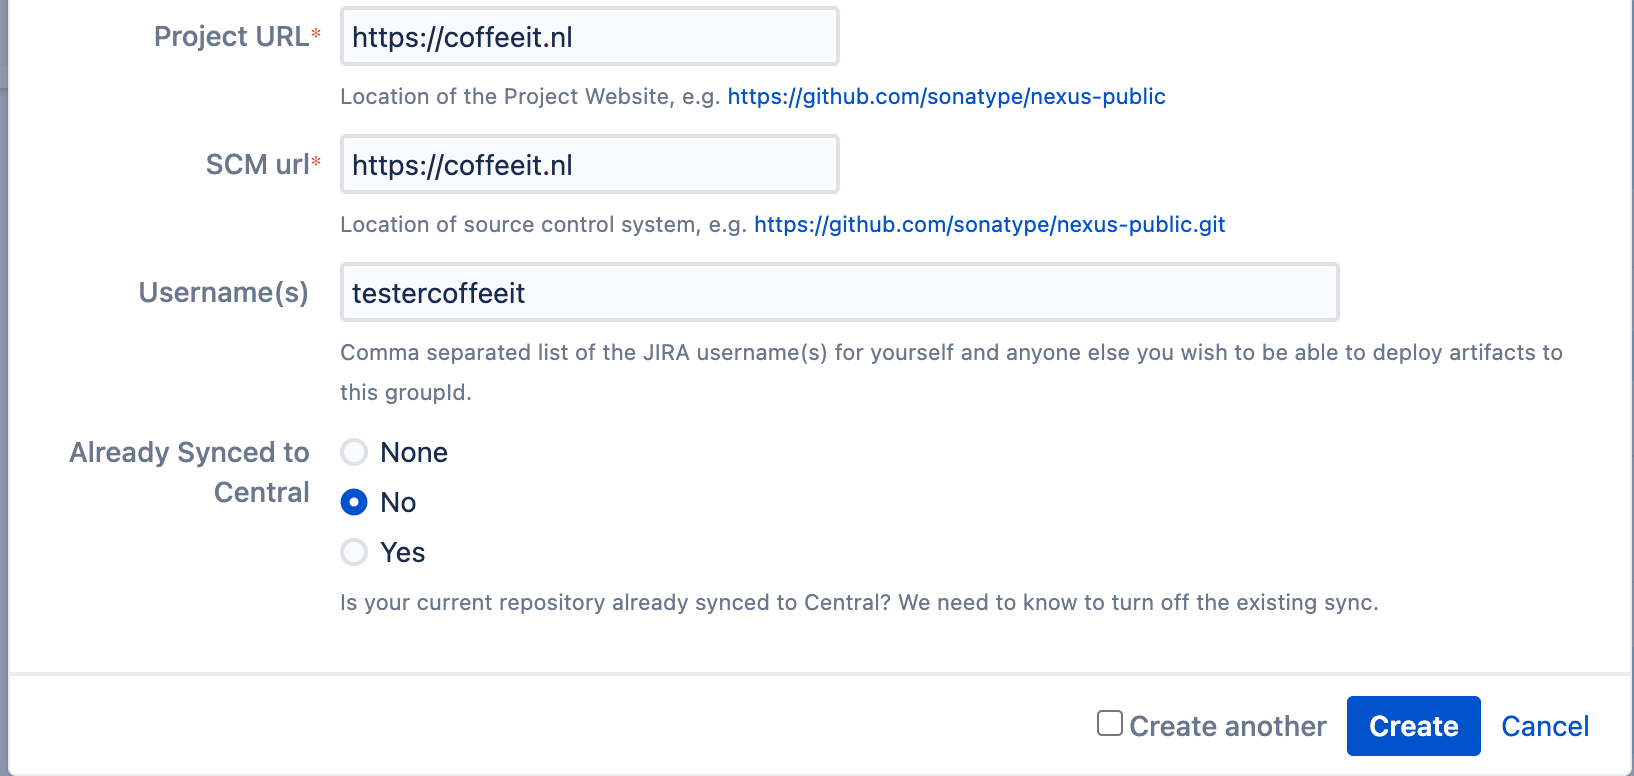
On Nexus Repository Manager you can log in with the credentials you also used on Sonatype’s Jira. When you log in and type your package ID in Artifact Search your library doesn’t show up yet. This is because a Sonatype bot or employee still has to create the group before you’re able to publish. If you don’t have a Sonatype account yet, create an account on Sonatype’s Jira. If you already have an account, log in with the known credentials. When logged in, go to Sonatype’s Jira to create a ticket and click Create. In the dialog that shows up, enter the information like shown in the screenshots, but of course, make sure to change the values. When you’re done, click Create.
After a while, a bot user will ask you to add a DNS TXT record to the entered domain to verify ownership of the domain. Follow the steps as required and explained in the comments. As soon as you’re able to login to Nexus Repository Manager with your account and see your group on there when searching for it, Sonatype is configured correctly.
Generating a GPG key
- Download and install GPG command line tools for your operating system.
- Open the Terminal.
- Generate a GPG key pair with the following command: gpg –full-generate-key.
- At the prompt, specify the kind of key you want or press Enter to accept the default.
- At the prompt, specify the key size you want or press Enter to accept the default. Your key must be at least 4096 bits.
- Enter the length of time the key should be valid. Press Enter to specify the default selection, indicating that the key doesn’t expire.
- Verify that your selections are correct.
- Enter your user ID information (use your own credentials instead of Coffee IT and tester@coffeeit.nl).
- Type a secure passphrase.
- Use the gpg –list-secret-keys –keyid-format=long command to list the long form of the GPG keys for which you have both a public and private key.
- From the list of GPG keys, copy the last eight characters of the long form of the GPG key ID you’d like to use. In the example, the GPG key ID is B3DOLD36.
/Users/daphne/.gnupg/pubring.kbx
--------------------------------
sec   rsa3072/5H879167B3DOLD36 2022-06-16 [SC]
      1DBBEF14EC9B0EF046DBE2C15B8C9078B3DOLD36
uid                 [ultimate] Coffee IT (Coffee IT GPG) <tester@coffeeit.nl>
ssb   rsa3072/DED668041236C7B 2022-06-16 [E]
Set up project
The next step is to set up the project. Open your project in Android Studio and add the following to the dependencies of the project’s build.gradle: classpath “com.vanniktech:gradle-maven-publish-plugin:0.21.0”. As of writing this blog, this is the newest version, but check for newer versions here. Add the following to the plugins of the library-specific build.gradle: id ‘com.vanniktech.maven.publish’.
Then add the properties to the gradle.properties like in the example. Also here you should make sure to replace the values and not keep the Pincode component’s values in.
SONATYPE_HOST=S01
RELEASE_SIGNING_ENABLED=true

group=nl.coffeeit.aroma
SONATYPE_STAGING_PROFILE=nl.coffeeit

POM_PACKAGING=jar

POM_URL=https://coffeeit.nl
POM_SCM_URL=https://coffeeit.nl
POM_SCM_CONNECTION=scm:git:https://coffeeit.nl
POM_SCM_DEV_CONNECTION=scm:git:https://coffeeit.nl
POM_ARTIFACT_ID=pincode
POM_NAME=Coffee IT Aroma components: Pincode
POM_DESCRIPTION=Pincode
POM_INCEPTION_YEAR=2022

POM_LICENCE_NAME=The Apache Software License, Version 2.0
POM_LICENCE_URL=http://www.apache.org/licenses/LICENSE-2.0.txt
POM_LICENCE_DIST=repo

POM_DEVELOPER_ID=coffeeit
POM_DEVELOPER_NAME=Coffee IT

mavenCentralUsername=[REDACTED]
mavenCentralPassword=[REDACTED]
signing.keyId=[REDACTED]
signing.password=[REDACTED]
signing.secretKeyRingFile=[REDACTED]
The value of mavenCentralUsername and mavenCentralPassword is the username and password of your Sonatype account. The value of signing.keyId is the key ID of step 11 of the previous section of this document (in the example it’s B3DOLD36) and the value of signing.password is the value you used to create the GPG key. Lastly, the value of signing.secretKeyRingFile is the path to the Pubring file. Make sure to never push these five values, since everyone that has access to these values is able to publish with the account. If you don’t want to copy and paste the values everytime you want to publish a new version, put the values in local.properties. If you’re using CI/CD, you could inject these values into gradle.properties with a script.
As of February 2021, all new projects began being provisioned on https://s01.oss.sonatype.org/. If your project is not provisioned on https://s01.oss.sonatype.org/, you’ll have to log in to the legacy host https://oss.sonatype.org/. If SONATYPE_HOST is not specified in gradle.properties it will automatically use the default, which is the latter.
Deployment
There are a few steps to take when you want to deploy your library. First, update the version of the library in the gradle.properties file. If you forget to update this version, the tasks started by the commands will still succeed, but there won’t be a new version available and previous versions won’t be overwritten. Then, if your project has a README, changelog or other documentation, make sure to update it. When you’re sure everything is updated, you can start running the first task.
In the Android Studio terminal, run the following command: ./gradlew [name of the library]:publish –no-daemon –no-parallel. So for our Pincode component it would be: ./gradlew pincode:publish –no-daemon –no-parallel. The publish-command creates a build of your library and stages it to Sonatype. It should be prefixed with the name of the library, because it would otherwise also include the sample app. When this task is done, run the following command: ./gradlew closeAndReleaseRepository. This closes the staged build we just created and actually publishes it.
When the closeAndReleaseRepository-task is finished, it will take about twenty minutes before the dependency resolves with Maven. As soon as it starts resolving, you can use the dependency in a project. It takes a day or sometimes even longer for the new dependency to show up on Maven Central Repository Search.